
Laboratory Technique
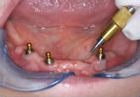
The abutments (either Sphero Block or Sphero Flex) are inserted by the clinician. The abutments are tightened with finger pressure until resistance is felt and then tightened another 1/4 turn.
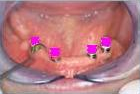
The directional rings are placed below the ball of the abutment. Directional rings are available in three amounts of correction; White is 0 degrees, Green is 7 degrees, Red is 14 degrees. The female nylon insert is snapped to place. Using an explorer, the direction rings are rotated until the female inserts are all parallel.
Once the attachments are made parallel, a stiff impression of the pink retentive insert snapped into position in the oral cavity is taken.
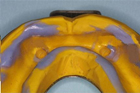
The Laboratory should snap a female nylon insert onto the male attachment analog. Insert the combined analog/insert into the impression.
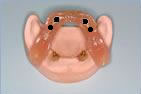
Pour the model and insert a black laboratoray processing female nylon snap into the stainless steel housing. If space is not available the female nylon snap will still work if incorporated directly in the acrylic without the stainless steel housing. However, it makes changing the nylon snap much more difficult. Use the stainless steel housing whenever possible. Process the denture.
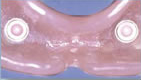
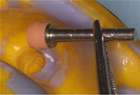
Block out undercuts in attachment if needed. Remove the black processing insert from the housing and replace it with a clinical retentive insert (e.g. pink or white). Finished prosthesis with stainless steel housing and female nylon snap.
| Order here |
Instructions: |